Home
::
Building a Quick 6.5hp engine - budget & reliable


Building a Quick 6.5hp engine - budget & reliable
Building a Quick 6.5hp engine - budget & reliable
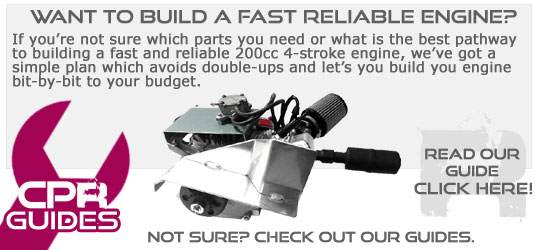
We're always being asked what the best way to build a GX200 and clone engine is so we've decided to write this failry straight-forward guide on what are the best performance parts bang-for-buck, and what order you should build your engine in.
Here's our roadmap or pathway to build our legendary stage 2 engine. Click any of the underlined links to find the parts being described.
1. Start with a good quality engine
If you're considering embarking on a rebuild you'll no doubt have either a failed engine, or an engine which you've at least driven. There is one very important fact that you should always consider when building an engine. The total is always going to be the sum of all the parts. That means that if you use a set group of parts in an engine, the engine output will only be as good as the engine you started with. So a poor quality engine will have a lower output than a good quality engine. With regard to this, it is obvious you should always start with a good quality engine to ensure your performance parts perform their best. There's nothing worse than putting a lot of money into a poor quality engine and having a mate beat you in a good quality engine that's had half the money spent on it!
Get an engine with a good head flow to start with, one that has good balancing on the internal parts - cheap clones will readily rattle apart in no time if you remove the governor. Preferably something without many plastic parts inside, and one that comes with a good quality carburettor. A poor quality carburettor will cause you massive headaches with high idling trashing clutches, and poor fuel mixing melting pistons with lean conditions at high rpm.
need an engine? You can find one by clicking here.
If you're rebuilding a failed engine, be careful. There can often be more damage than visually noticable - or you can miss damage you might think isn't relevant. Scored or out of-round crankshaft jouranls will cause a new conrod to fail quickly, whether it's an aftermarket or stock one, you'll definitely need to ensure it's gapped correctly to avoid disappointment. Check the bore isn't scored, that there is no damage on the piston skirt, the gudgeon pin, the piston itself - do the rings, they're cheap and good insurance against poor compression. Consider replacing crankshaft bearings - they aren't overly expensive and will save your second conrod if they're about to or have already failed. Don't use a camshaft with a plastic gear if you can possibly avoid it - particularly on an engine that has already failed - at least buy a new stock one with a metal gear, or consider a new grind - they are pretty inexpensive.
2. Buy a tacho
Would you improve your car engine's abilities and rpm range and not use a tacho to determine if you're revving it too hard? Why would you do that to your kart engine? Set a realistic rpm limit and stick to it and enjoy your engine immensely longer. A cheap clone won't rev as hard as a good one, but both will happily destroy themselves if your throttle is held flat and it reaches it's maximum revs for a period of time. While we will go through how to improve this scenario with a good connecting rod further in the guide, it makes sense to buy a tacho that has a large enough display to read, and preferably something with a backlight and a max-rpm alarm so that you know when you hit your maximum safe rev limit. Plus, you can run reduce your risks if you're removing the governor and don't replace the flywheel (which we do not condone - we always recommend replacing the flywheel with a billet one if removing the governor) by revving the engine at a fairly safe limit instead of flat out.
Looking for a good and cost effective tacho? You can find one by clicking here.
3. Consider your upgrade path
There's no point decking out your engine with all the affordable parts if you're just going to replace them in a month or two when you tire of the engine power. We guarantee you once you upgrade, it won't take long for the bug to bite and send you back to upgrade again. Try not to do it twice if you can help it as the money is better spent getting better parts the first time, and going without the ones you really want until later so you get maximum bang for buck in the end. While this may seem complicated, we will provide a pathway in the guide that lets you do exactly that.
The pathway.
The golden rule is always to start at the bottom and work your way up.
A. Remove your governor
Our governor removal guide can be found here:[url=%20http://cutpriceracing.com.au//phpbb3/viewtopic.php?f=13&t=808]http://cutpriceracing.com.au//phpbb3/viewtopic.php?f=13&t=808[/url]
Of course you'll need to re-do the throttle linkage system so if you want to do that properly, we highly recommend using the CPR 10hp upgrade kitwhich consists of all the linkages, a top plate, a fuel pump, vacuum sandwich to operate the fuel pump, new muffler, air filter & venturi, new jet for your carb, all the nuts and bolts and gaskets, fuel lines, vac lines etc.
The combination of these two modifications will add at least 30% to any engine - with some producing even more depending on the quality of the initial engine.
If you do this with odd-parts, you may want to consider installing a proper race muffler at this point. While it won't improve your output very much, it will save you throwing away your cheaper sports muffler when you get to step
B. Add a billet flywheel for safety at higher RPM (We strongly recommend not skipping this step, but if you do make sure you read this step anyway)
Depending on your budget, you may choose (unwisely) to skip this step. If you do, ensure you don't rev your engine too hard or you run the very real risk of catastrophic flywheel failure which is extremely dangerous. However, we do know that most engines will endure the basic mods listed in A. without the flywheel upgrade so long as they are not revved out to their maximum. Usually 1000rpm less than the maximum they will go to under load will work, although we do not recommend doing this for safety reasons. If you are going to go down this road, at least buy an easy to read tacho and keep your engine rpm down. Make sure you aren't holding the rpm flat (such as speedway driving or drifting) or you'll either destroy the flywheel, or the conrod quickly.
If you're getting a flywheel, don't buy just the cheapest thing you can - you'll end up with poor ignition timing when you decide to add other parts down the road. Get a good quality flywheel.
C. Add a billet conrod with a proper bearing to avoid seizing engines at higher RPM
The conrod in your stock engine does not have a bearing. Instead it's lubricated by a thin film of whatever engine oil you use in your engine. It makes sense that your engine should have nice clean engine all the time so that this film is always in good condition. The oil enters the journal by way of a small couple of millimeters in diameter hole. So if your engine oil gets dirty and this hole is blocked, goodnight engine. Also, if your engine is spinning at high rpm, the oil will be forced back out of this hole and your conrod will run dry - again, you'll be bang out of luck - pun intended. That's why so many engines stock engines lock up when their governors are removed, particularly if they are driven at high rpm for long periods of time. Get a quality billet con-rod and don't chance it. Because the billet 'rod runs a slipper bearing, if they are starved of oil for some period they will wear instead, giving your engine some precious insurance against seizing. Then you can just replace the conrod rather than the whole lot of your expensive engine bits. They're not expensive compared to a new engine and they will dramatically improve the strength of your engine when you put more power into it.
D. Add 18lb valve springs to improve your rpm limit (or skip this step and install the 26lb ones instead)
When you've done all of the above modifications, it's time to improve your rpm limit. Installing a set of 18lb springs is the most cost effective solution IF YOU'RE NOT GOING TO UPGRADE ANY FURTHER. If you do, you'll need to consider going to 26lb otherwise you'll buy springs twice. Some customers have claimed that 18lb springs have been used in engines with stock flywheels without trouble. While we do not recommend this, if you've skipped the flywheel step you may get away with 18lb springs. However, you will not get away with 26lb springs in an engine with a stock flywheel.
E. Install stronger chrome-moly pushrods
At higher rpm, with more force being used to close the valves faster, the pushrods are under more pressure and stock ones tend to bend at this point. Get yourself a set of stock length chrome-moly pushrods - they're not expensive, and they will keep your engine purring away nicely at higher rpms.
F. Add 26lb valve springs to further improve your rpmlimit
If you're on 18lb springs, 26lb springs will improve your rev range further. This will give you more speed, or more accelleration depending on your gearing. 26lb springs will definitely bend stock pushrods, so at this point you have no choice but to replace the pushrods too if you haven't already done so. If you haven't installed a billet flywheel now, DO NOT EVEN THINK ABOUT RUNNING YOUR ENGINE UNTIL YOU DO INSTALL A BILLET FLYWHEEL. You are dancing with the devil if you don't run a billet flywheel at this stage of your build.
G. Fit 1.3:1 ratio rockers to improve the stock cam's lift
There are a couple of ways to get this done, but the easiest and most cost effective way to start is via the head. To do that, you'll need to install higher lift rocker arms. Stock arms are 1.1:1 ratio. Higher lift is acheived by using 1.3:1 ratio lift rocker arms. If you do this, you'll either need to file out your stock pushrod guide plate to accomodate the extra angle achieved by the higher lift ratio rockers, or you'll need to replace it with an aftermarket guide plate (these are cheap anyway).
H. Install a 98 Fuel Jet and improve your fuel delivery (skip this step if you are installing a worked carburettor)
At this point you'll be needing a bigger fuel jet. We'd recommend installing a 98 jet, or simply skip this step and do your cam and carburettor at the same time.
I. Improve your muffler to a race spec muffler and let your engine breathe
Power will be considerably improved at this point by adding a quality race muffler. The best mufflers out at the track are RLV mufflers. They're not cheap, but they produce premium power and sound nice and deep.
J. Add a 265 lift cam for more lift and more power
At this point, it's time to consider a cam. But this comes with the necessity to open up your carb more for some more air and fuel so we recommend doing the cam and the carb upgrade at the same time if possible. The CPR Stage 2 cam (265 lift) is the most cost effecitve and provides reliable power output. You'll get the most bang for buck out of those three upgrades together.
K. Install a .670 Carburettor
Ideally you'll install this at the same time as the cam to allow the engine to breathe properly.
L. Install a flat-top piston, ring set, and ideally a high compression head gasket to increase compression and power further
Install a flat-top piston and ring set for improved compression and extra power. This will bring the previous upgrades alive. Ideally we recommend installing a high compression steel viton-coated head gasket at this point to capitalise on the increased compression.
M. Port or install a ported head
Improving the port design of even the better heads will improve flow and therefore power, particularly at the top of the rpm range. You can either pull the head down and get someone to port it for you, or you can get one that's done correctly from CPR off-the-shelf.
Congratulations, your engine is now at the same specification as the CPR stage 2 engine which produces at least 14hp.
Need Help?

Gift Certificates

Categories
Bestsellers


Special
My Shopping Cart
My Shopping Cart
Cart is empty
My Account
Free Same-Day Dispatch!


Product Updates via Facebook

Get notified about our holiday times

We Accept Paypal

Outstanding Service!