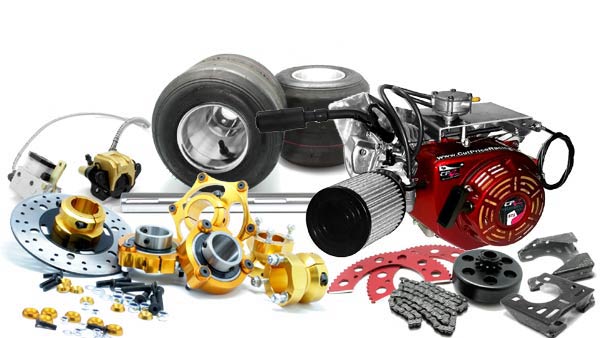


Guide - Buying the correct parts to build Powered Sliders & Drift Trikes
Guide - Buying the correct parts to build Powered Sliders & Drift Trikes
Guide – Building a powered Slider Drift Trike – choosing the right components
By Cut Price Racing (www.cutpriceracing.com.au) 2016
1. Introduction
2. Part 1 - Rear Axle Assembly - Choosing the right axle and bearings
3. Part 2 - Choosing the right engine and why you shouldn't buy a 13hp stationary engine
4. Part 3 - Choosing the right wheels, tyres & plastic tyre rings
5. Part 4 - Choosing the right clutch
INTRODUCTION
You’ve seen those awesome powered sliders on you tube and you’ve decided to embark on building one yourself – one thing is for sure – you’re going to have loads of fun! What could be more exhilarating than hurtling sideways with a powerful engine spinning a set of wheels right behind your butt? There isn’t much that can compare with the sheer fun, cost effectiveness, and excitement that comes from driving a properly designed and built drift trike.
But where do you start? There are loads of people building them but which ones work, and which ones cause no end of headaches for their owners?
Well you’ve come to the right place, because at Cut Price Racing we’ve been dealing with Powered Drift Trikes since their birth, including the popular downhill slider trikes. We’ve seen all the mistakes, and all of the successes – and there are lots of both. There isn’t just one way to build a drift trike, you can do it your way, or any other way you like. But one thing is for sure, we’ve been dealing with manufacturers of commercial drift trikes long enough now to know that there are some companies that build a drift trike that customers spend time drifting, and some companies that build drift trikes where customers keep coming back to get repairs. We think you should build the trike that you can spend hours on hours having fun in, not the one that needs constant money poured into it causing you to give up on such a fun activity.
So that’s what our guide is all about, getting you up and running the correct way at the lowest cost and doing it all just once – correctly.
If you follow our guide, we can help you avoid failed engines, failed clutches, failed chains and sprockets, failed rear axle assemblies, failed rear rims and hubs – we’ll help you avoid damaging all those components at the beginning so that you can enjoy your drift trike for longer.
There is just once small catch, we can’t help you with the front end of your slider or the rear frame – but that part is relatively easy – just get yourself an old bike and use the front of the frame, forks, front wheel and handlebars and you’re virtually done. You can make your own rear frame or cut the rear off a go-kart if you would rather start with something simple.
PART 1 – Rear Axle Assembly - Choosing the right axle & bearings
It might not seem important, but the wrong axle and bearings can cost you a fortune in failed engines, ruined chains and sprockets, bent axles, and rims and rear axle hubs that are destroyed due to coming loose from vibration.
Seriously? All this can happen by choosing the wrong rear axle assembly? Yes, absolutely.
Cut Price Racing has spoken to lots of customers who have had to buy a second assembly to remedy issues with their ATV assembly or pillow-block bearing assembly which they have had to re-sell or bin.
Here are the do’s and don’ts when sourcing a suitable axle assembly.
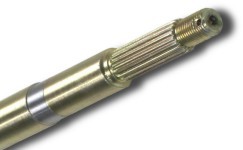
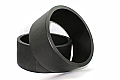
#1 – DON’T BUY AN ATV AXLE ASSEMBLY. It will give you headaches before you even start the build.
Above: Picture of ATV Axle Assembly (from google images)
While there are many different types of axle shafts on the market, and available cheaply, it is not a wise idea to select ATV style axle assemblies. They may be cheap, but you’ll end up with 2 significant problems - #1 you won’t be able to buy 3-bolt go-kart compatible rear wheel hubs, and #2 you will end up with imperial (inches) sized axle shafts which you won’t be able to find replacement hubs and carriers for and you won’t be able to fit go-kart style rear sprockets which will severely limit your chain and sprocket pitch choices and likely cause rapid burning out of your clutch. Not only this, but if you do end up modifying it in some-way, you will be left with a highly customised setup which you won’t be able to easily buy any replacement parts, certainly not from anywhere local. Even if you can find something, you’ll be stuck with replacement parts from online stores – so you’ve got no chance of getting something fast (or straight away if something breaks while you are out with friends). Then there is the fact that you’ll most likely end up with pillow blocks holding your bearings to your frame – while convenient, there are real dangers with doing this that can have serious effects such as destroying your engine but we’ll talk more about that further into this section.
So how do you know if you’re looking at an ATV axle assembly? There are a few dead give-aways such as:
- The shaft size is 1 inch or another imperial measurement (like ¾” or 5/8” or 25.4mm or similar)
- The shaft has splined ends for the wheel hubs rather than keyed straight ends
-
- The shaft is tapered (not a uniform diameter/thickness all the way along the shaft)
- 
- (ABOVE – ATV splined and tapered axle shaft - Image from Google Images – gokartsupply.com)
-
- 4-Bolt or 4-stud wheel hubs are included in the assembly (these have no chance of fitting the wheels required for your trike, and there are no adaptors available anywhere that will allow you to fit 3-bolt go kart rims – we get this phone call from customers all the time and it simply can’t be done unless you want to pay big dollars for an engineer to make you an adaptor.
-
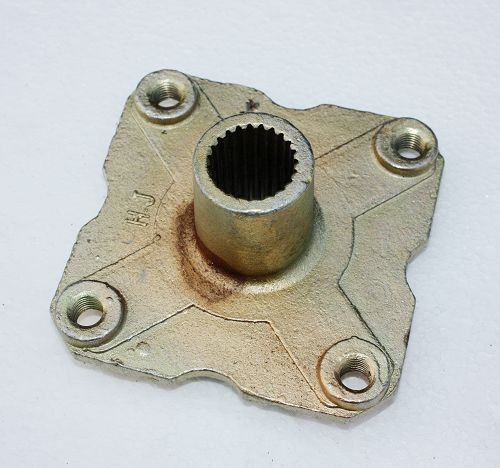
- (ABOVE – ATV Wheel Hub - Image from Google Images – Blygo.com.au)
-
- Brake disc hubs are welded rather than keyed (this has other obvious consequences like not being able to configure the carrier locations as required)
- 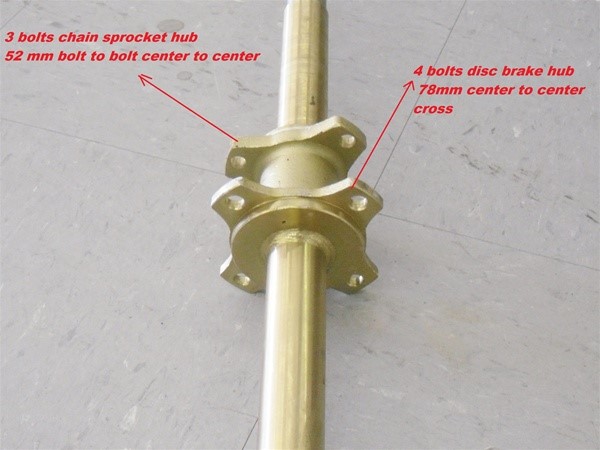
- (ABOVE – ATV Brake Disc Hub & Sprocket Hub welded to the shaft - Image from Google Images uscoolsports.com.au)
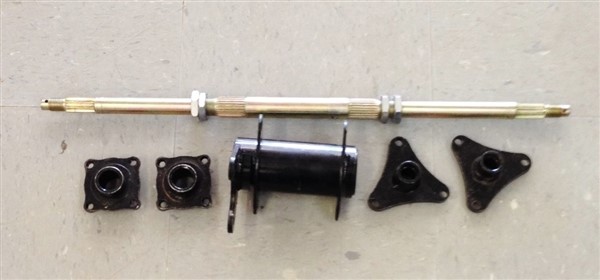
#2 – *DO* BUY A GO KART Rear Axle Assembly WITH A HOLLOW AXLE SHAFT if possible.
.jpg)
Generally there are two main types of axle assemblies readily available which are popular with drift trike builders. Both are go-kart assemblies. They can be bought with bearings, self-aligning holders and weld-on brackets (Cut Price Racing recommends this bracket style-solution) or with pillow block style bearings (we do not recommend pillow-block style kits). The main reason you should buy a go kart assembly is that you can easily source all the parts required for your trike, and all of them will fit with ease.
GO KART AXLES ACCEPT THE CORRECT SIZE RIMS AND TYRES FOR READILY AVAILABLE SLIDER RING PIPE
All go kart rear rims are a standardised 3-bolt hub pattern. This is a good thing because it makes it easy to find the correct rims. Because people all around the world have been using go kart axle assemblies to build their drift trikes, there are now companies selling pipe to suit the standard size tyres so you don’t have to re-invent the wheel (excuse the pun). You can even buy the pipe directly from Cut Price Racing in small quantities – like just a single pair, instead of having to buy many metres of the pipe. This means you can get high quality long lasting pipe which is properly cut and QC’d and perfectly round for a great price, rather than having to buy lots of low-quality thin soft material that wears out super-fast and vibrates your slider apart. You can read more about the best tyres and pipe to use further down inside this guide.
GO KART AXLES ARE METRIC SIZES AND ALL PARTS ARE READILY AVAILABLE AT GO KART SHOPS IF YOU GET STUCK

If you’re out enjoying your slider and have a hub or carrier failure, wouldn’t it be nice to be able to drive to the closest go kart shop and pick up a replacement (even if it’s a bit pricey). With a standard size go kart axle shaft in a metric size you can do exactly that! We do recommend you stick with the currently popular diameters though – don’t buy 25mm or 35mm if you are hoping to get spares from your local go kart shop. You might be able to order them from Cut Price Racing online, but those sizes are obsolete and are generally not supported by the smaller shops now. Soon those sizes may not be available at all and if they are they will be very expensive.
CHOOSE A 40mm HOLLOW AXLE SHAFT IF POSSIBLE SO YOU CAN BUY REPLACMENT PARTS EASILY AND CHEAPLY
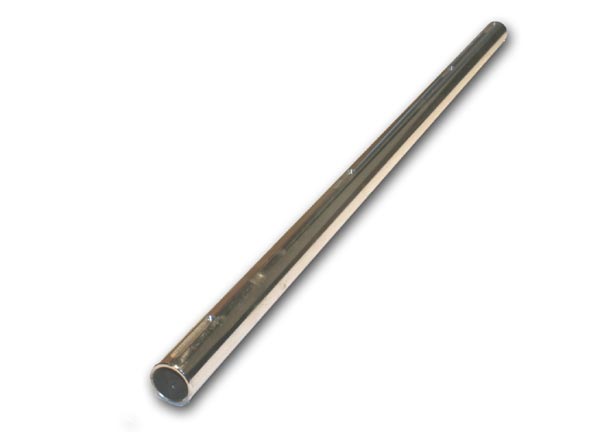
Stick to Hollow 40mm axle shafts – these are the most readily available sizes and you’re more likely to find second hand replacement parts or even cheap new parts – choose a hollow shaft so that they are not heavy – solid shafts can weigh up to 3 times as much as a hollow shaft and due to their design they aren’t necessarily stronger. Even a 25mm solid shaft will outweigh a 40mm hollow. This means you'll have more weight in the back of your slider and it will be harder to control a slide.
Cut Price Racing 40mm hollow axles are stronger than most of the axle shafts on the market due to the special chrome coating system used on them to improve strength and longevity.
GO KART AXLES HAVE THE WIDEST RANGE OF GEARING (SPROCKET) CHOICES
The carriers designed for go kart axles are standardised and have been the same for over 50 years. This means that over the years many people have raced and used many pitches and sizes of sprockets. This gives the manufacturers scale of economy to produce lots of different sizes cheaply so in-turn they become more popular. The end result is that you can buy sprockets off the shelf to fit 420P, #35 and 219P (you can learn more about chain pitches here: http://www.cutpriceracing.com.au/phpbb3/viewtopic.php?f=14&t=28 and you can learn more about sprocket sizes here: http://www.cutpriceracing.com.au/phpbb3/viewtopic.php?f=14&t=10 ). We recommend choosing #35 gearing because it is the most convenient to fit and has the widest range of clutch and front and rear sprocket size options, ensuring you will find exact right gear for your slider and that you receive the best lifespan from all of your components as well as the greatest quality of hassle-free fun.
GO KART AXLES ALLOW YOU TO PROGRESSIVELY UPGRADE AND RE-CONFIGURE (items such as rear brakes)
Because you can buy all sorts of parts to suit standard metric go kart axle shafts, you’ll always be able to start small and scale up, or add extra things to your axle shaft. If you decide to go without a brake disc and carrier initially to keep the costs down, you can do that (although we don’t recommend doing that as you will find you need one – see the next point) and then buy one later. If you require something else such as a water pump pulley, or an axle locking collar all of these things are readily available to suit your axle shaft.
GO KART AXLES ALWAYS HAVE BRAKE DISC AND HUB OPTIONS AVAILABLE (*AND YOU WILL CERTAINLY NEED IT*)

A lot of people consider building a drift trike without a rear brake because they use a cheaper push-bike style brake on the front wheel and the weight transfer will be on the front wheel under braking. While this seems logically sound there is a massive hidden problem associated with not having a rear brake.
When you try to stop a slider and apply the front brake, if the rear is not 100% straight it will attempt to spin on it’s axis. Think about a semi-trailer for example. When the driver hits the brakes he has to be extremely careful that the trailer does not jack-knife. The biggest problem with a slider is that usually you’re sliding (going sideways) so you won’t be driving straight and the jack-knife problem will be very severe.
The problem isn’t so pronounced on a push-bike because you are the largest section of weight. When the rear begins to slide you can push your weight over the front bars and keep the rear end from sliding out – friction will take care of things for you. In a slider though, you have a big engine and a heavy rear frame and axle assembly – even if you manage to get weight over the front wheel (which you won’t be able to do because of the seating position) you’ll still have too much weight over the rear assembly and it will want to come around and meet your front wheel.
If you have a rear brake, you can modulate the front and rear so that the braking force is reasonably even which will stop the rear from jack-knifing and you losing control of your slider.
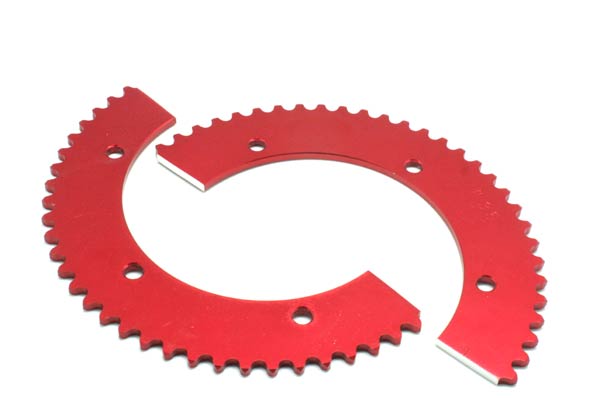
GO KART AXLES CAN BE BOUGHT IN VIVID ANODISED COLOURS


If you want a good looking slider trike, you’ll probably want to consider an anodised setup to give you a colour theme. Cut Price Racing 40mm assemblies are available in Blue, Black, Gold, Red, and Silver – all of these colours are bright and look very impressive. Why build a trike that looks ordinary when you can have one that is personalised and looks professional and impressive for no extra cost?
#3 – DON’T Buy Pillow Block bearings for your axle assembly.

You might be asking at this point – why are you telling me not to buy pillow block bearings when you sell them yourself? Yes you’re right – we might sell pillow block bearings BUT we do not recommend them. They do work, they are cheap and they are convenient (you don’t have to weld them to the frame) but they have one significant issue that causes a lot of problems.
You might also be asking – why are so many manufacturers trying to sell me drift trikes with pillow blocks if they don’t work. That’s a great question, and while they can work perfectly, there are great risks that come with using pillow blocks and personally we here at Cut Price Racing simply don’t think it’s worth it. We get calls from customers with pillow-block style axle assemblies regularly that are experiencing problems which they associate with other things such as their clutch failing for example, but the underlying cause is often the axle assembly. So why do manufacturers use pillow blocks then? Well the simple answer is that they don’t fully understand what the risks are and what goes wrong – usually they have not tested enough prototypes for long enough to discover the issues. Only when you buy one do you learn about all the problems and have to spend your own money fixing them (unless your manufacturer is accessible and willing to help you).
PILLOW BLOCK BEARINGS ARE NOT SELF-ALIGNING SO THEY CAUSE AXLE BINDING
What this means is that unless you are extremely careful lining up your bearings correctly inside your pillow block housings (we would recommend using a laser chassis aligner to get them right) then when the axle slides through them there will be pressure on the axle, trying to bend it.
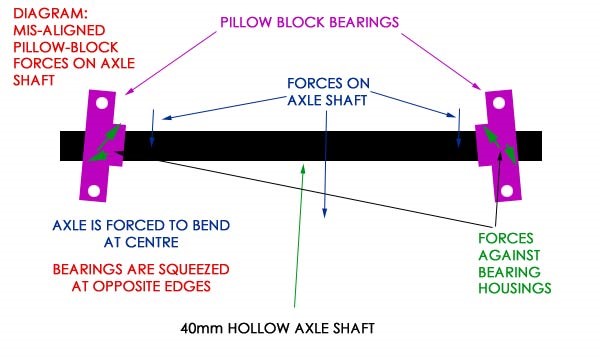
When this happens, the bearings ‘bind’ which means they become more difficult to spin. This increases with time due to the ball bearings inside the bearing housings being forced against the side of the housing and grinding grooves which add further friction and can completely stop the bearing. This has some very severe effects on the rest of your drivetrain, and also on your engine.
a. YOU WILL GET VIBRATION IN YOUR WHEELS WHICH WILL DESTROY YOUR WHEELS & HUBS. Vibration can cause your wheel hubs to slide off and your wheel nuts to become loose and damage your rims - Because the axle shaft is under pressure to bend to accommodate mis-aligned bearings, over time the axle shaft will bend to accommodate a small amount which will then cause the ends of the shaft to rotate off-centre. This is transferred into the wheels and you feel it as vibration. Over time this can cause your rear wheel lugs to work loose, gouging out large slots in your rims – virtually destroying them. Once this happens, it will likely pull the bolts or studs from your rear wheel hubs which is impossible to fix. Even worse, the hubs can vibrate completely loose and fall completely off the shaft which is not only embarrassing, but also costly as you’ll most likely need a new rim and new hub as well as any other parts which may start sliding on the ground due to the wheel missing such as brake discs and sprockets and chains.
b. YOU WILL GET MASSIVE PRESSURE ON YOUR SPROCKET, CHAIN AND ENGINE CRANKSHAFT WHICH WILL ULTIMATELY DESTROY YOUR SPROCKET, CHAIN AND ENGINE. Pressure on the axle to bend and subsequent bending of the axle can cause failure for all of those items in the transmission system – the most expensive being your engine. When an axle is more difficult to turn, it requires more power to turn it so all of your items work harder. Your sprocket is usually the weakest link and should strip it’s teeth before anything else happens if you use an aluminium one, but if you’re using a steel rear sprocket you’ll break your chain or in the worst case, the stress will be transferred to the engine. But it get’s worse. When the axle bends to accommodate the pressure from the bearings, you’ll have a sprocket that rotates off-centre, pulling on the crankshaft of the engine for half it’s revolution as it’s further away from the engine at that point. So even an aluminium sprocket won’t save you then. What that does inside the engine is bends the crankshaft slightly. This bend might not seem too problematic, but because most engines used on drift trikes are stationary engines, and stationary engines use a thin film of oil between the crankshaft and the connecting rod rather than a bearing, the oil film is squeezed out and the connecting rod heats up on the crankshaft. This causes the engine to seize and it will stop. At that point the engine is a throw-away item as it’s simply not cost effective to repair all the damage that is caused by a connecting rod / crankshaft seizure.
#4 *DO* BUY GOOD QUALITY BEARINGS WITH SELF-ALIGNING HANGERS AND BRACKETS TO SUIT.
They might require welding on, but even if you get the angle slightly wrong, the bearings will adjust to suit and your axle shaft will stay true and rotate freely, ensuring you do not get caught out by any of the problems we’ve just spoken about.
Guide – Building a powered Slider Drift Trike PART 2 – Choosing the right engine and why you shouldn’t by a 13hp stationary engine.
It’s a common mis-conception that for a drift trike a bigger engine is better, and there sure are a lot of options on the market for big block high horsepower stationary engines at very low prices. So why shouldn’t you buy a 13hp stationary engine for your drift trike?
Let’s start with what you do want for your drift trike and why.
GETTING A GOOD GEAR RATIO
When you ride your drift trike, what you will want is a good gear ratio that gives you a good compromise between acceleration and top speed. You’ll want snappy acceleration to break the rear wheels free at precisely the time you want which will come from a very short ratio, and you’ll want enough road speed on the wheels to do that at different speeds as well as have them rotate fast enough that they can be modulated as your drift trike slides to correct or drift the trike more.
To get a good gear ratio, you’ll need two things – a small front sprocket and a large rear sprocket. The ratio of rear to front where the rear sprocket is 60 teeth and the front sprocket is 12 teeth can be found by dividing the rear sprocket by the front sprocket (60 divided by 12) – which gives a ratio of 60:12 or 5:1 (spoken as “five to one”) A good table to refer to can be found here: http://www.cutpriceracing.com.au/phpbb3/viewtopic.php?f=14&t=10
The problem with a large rear sprocket is the obvious issue of ground clearance. So to get the shortest ratio, you’ll need the smallest front sprocket. In #35 pitch, the smallest rear sprocket that can be fitted to a 13hp is 15T. If we were using the same 60T rear sprocket, the ratio would be 60 divided by 15 or 4:1 (spoken as “four to one”). We call this 4:1 ratio a “taller ratio” compared to the 5:1. A 5:1 ratio will have faster acceleration and lower top speed. A 4:1 ratio will have slower acceleration and higher top speed.
STOPPING THE CLUTCH FROM DESTROYING ITSELF
So why is a 4:1 ratio a problem? Well there is another issue with the chosen ratio, which is the speed we refer to as the minimum speed. Minimum speed is the amount of road speed (speed of rotation of the rear wheels) required to fully engage the clutch. Most clutches engage at 2000rpm, so the longer the ratio the higher the speed that is required to fully engage the clutch. A clutch that is operating at a lower speed than 2000rpm is generating a lot of friction, which creates heat, which destroys the tension in the spring(s) in the clutch which in-turn makes the clutch stick on all the time (we call this a failed clutch). You can read more about this in this guide: http://www.cutpriceracing.com.au/phpbb3/viewtopic.php?f=14&t=807
WHAT HAS THIS GOT TO DO WITH 13HP ENGINES?
The outer diameter of the output shaft (crankshaft) of the engine where the clutch slides on dictates the minimum number of teeth that can be placed on to the clutch.
We refer to distance between teeth on a sprocket or the distance between pins on a chain as the pitch. This distance must always stay the same for the chain and sprocket to mesh.
As you can see from the diagram below, looking at the green line if we were to make the sprocket larger, either the size and distance of the teeth would need to change (this would change the pitch) or there would need to be more teeth on the sprocket to fill the larger circumference.
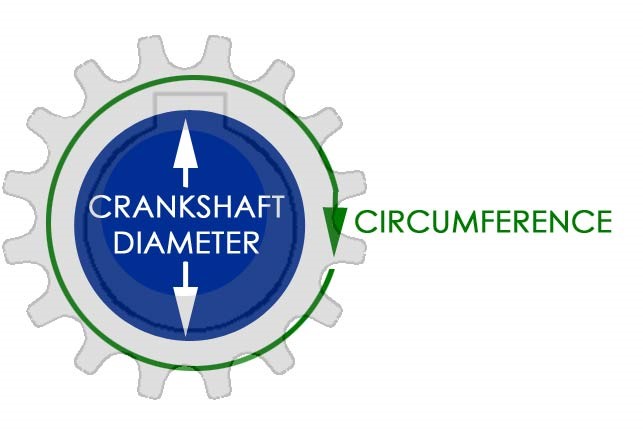
The problem with the 13hp engine (and all 9hp, 11hp, 13hp+ engines) is that they have a large crankshaft diameter (1 inch = 25.4mm) which means the least number of teeth that can be used in a #35 pitch is 15 teeth. This means your gear ratio will be much taller, and more problems will exist in relation to clutches burning out and poor performance.
Using an engine with a smaller crankshaft is the obvious solution, and smaller sprocket sizes are available for ¾” (19.05mm) crankshafts such as 12T or 13T. This will provide a much better gear ratio for your slider.
WHY SHOULD I TRY TO KEEP MY SLIDER REAR END LIGHTWEIGHT?
The other problem with a large horsepower output stationary engine is that it will be a large capacity – and a large capacity means more weight. The more weight you put over the rear axle component of your slider, the more ‘pendulum effect’ you will receive which will cause issues when attempting to hold a drift steady. With more weight, you will more easily over-correct and you won’t have the ability to bring the rear of the slider back again. Putting large capacity engines on sliders and/or go karts can be a problematic solution to power improvements.
WHY SHOULD I AVOID GOVERNED ENGINES FOR MY DRIFT TRIKE?
All stationary engines have their RPM range governed out of the factory to ensure long life. In addition, a governed engine is quite limited in terms of the available RPM range. With a limited RPM range, top speed is limited, and also the ability to modulate RPM is limited to between the minimum engagement RPM of the clutch (2000rpm) and the maximum governed RPM of the engine (usually 3500rpm) – providing a small band (1500rpm) of usable power.
Of course, the problem with a smaller crankshaft is that you will end up with a lower capacity engine and less power output. However, the advantage of a better gear ratio and also a lighter engine far outweigh the limitations of the lower amount of power. In fact, drift trikes don’t so much require horsepower as they do require usable RPM range so that you can control your drift.
The solution to the problem of power and RPM range with a smaller capacity engine comes via removal of the governor. This allows the engine to RPM to rise to approx. 5500, giving a usable RPM range of between 2000-5500 rpm (3500rpm) or nearly 3x as much usable RPM range. Of course, removal of the governor does require some mechanical experience and can be risky on very cheap 6.5hp clone engines. We recommend considering our high-grade engines with the governor factory removed. Cut Price Racing offers 10hp engines based on the 6.5hp base offering the same lightweight solution with a full RPM range up to 5500rpm for extremely enjoyable slider operation. This is the engine of choice for professional engine builders. The engine we recommend can be found here: http://www.cutpriceracing.com.au/store/4-Stroke-Engine-LIFAN-OHV-10hp-192cc-Complete-Upgrade-and-Governor-Removal-12T/
IS THERE ANY WAY TO GET A 13HP ENGINE WORKING ON MY TRIKE?
Another option for the increase of RPM range is by use of a Torque Converter – you can learn more about those here: http://www.cutpriceracing.com.au/phpbb3/viewtopic.php?f=14&t=807
These can be used to solve the issues with the gear ratio of the larger crankshaft engines, but at a cost – the cost of a suitable torque converter for 9hp+ engines is $399. For a 6.5hp engine the cost is just $199. Torque converters can be found here: http://www.cutpriceracing.com.au/store/Torque-Converters/
When buying an engine for your slider, always consider what is required to get it operational. Virtually all stationary engines are set up with a static throttle lever and will need to be converted to a sprung returning throttle lever attached to a suitable throttle cable. To do this safely requires some specialised components as well as time to set them up. You will also need to arrange suitable mounting hardware to mount the clutch, and you will need to remove any low-oil sensors to avoid the engine stalling when turning corners or sliding. Cut Price Racing engines all have these modifications performed out of the factory and do not need any additional work performed – you’ll get a safe and easy bolt-on-and-go style engine at a very low price delivered to your door. We always recommend our 10hp engine for powered slider use due to it’s excellent performance characteristics and also ease-of-use and bolt-on-and-go style setup. You can find our 10hp engine here: http://www.cutpriceracing.com.au/store/4-Stroke-Engine-LIFAN-OHV-10hp-192cc-Complete-Upgrade-and-Governor-Removal-12T/
Guide – Building a powered Slider Drift Trike PART 3 – Choosing the right wheels, tyres & plastic tyre rings
Probably the most critical, but easily overlooked section of the slider is the rear wheels. These can make or break your slider building experience. Get the wrong wheels and tyres and you’ll struggle to get any plastic pipe to fit the tyres.
There are several ways you can go – you can use front bolt-on rims and front tyres, rear bolt on (210mm or 180mm) with wet or dry slick tyres, or a combination of the two such as front tyres stretched over rear rims (we do not recommend this due to safety hazards).
Front rims and tyres will make your slider rear end very close to the ground. Front tyres are only 10 inches in diameter whereas rear tyres are 11 inches. This improves even more when the tyre rings are installed. Smaller tyre diameters limits your sprocket size options as well as surfaces you can use your slider on.
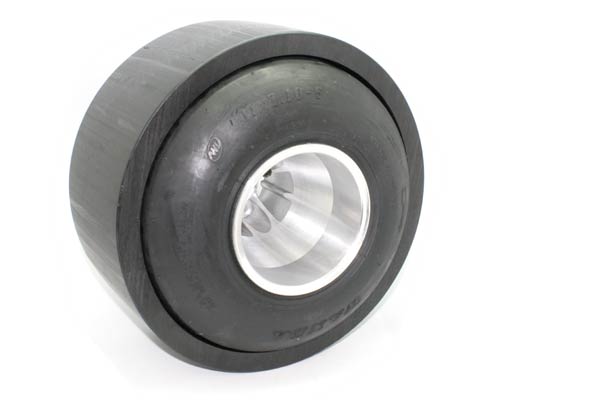
We recommend using rear tyres and rear rims (180 or 210mm are fine) and installing our high density long-life professionally cut slider tyre rings. Our rings and wheels have been developed to work perfectly on powered sliders so that you can have hassle-free use for long periods of time. Our high density PIHA pipe is the best quality available and has the least amount of vibration due to it’s uniform outer diameter so you will experience the least amount of problems with wheels, hubs and other vibration related failures.
Our tyre rings fit most rear 11x7.10-5 rear tyres mounted on 180mm or 210mm rear rims and can be found here: http://www.cutpriceracing.com.au/store/Slider-Tyre-Ring-Set-PAIR-NEW/
Guide – Building a powered Slider Drift Trike PART 4 – Choosing the right clutch
When choosing a clutch for a powered drift trike there really are two main areas of concern that you should be taking in to consideration. The first is the sheer force the clutch will be under as it is operated. Initially, you will find that the clutch will be operated lightly under low power, but when initiating slides, the clutch will receive a hard hit from the accelerator. Each stab of the throttle will increase the abuse provided to the clutch. It is very important to choose a clutch that will be able to handle this on/off behaviour.
The second thing to consider is that there will be plenty of times that the clutch is subject to less than 2000rpm – so having a clutch that can endure the heat build-up of slipping under the fully engaged zone is also important. You can read more about the engagement zone here: http://www.cutpriceracing.com.au/phpbb3/viewtopic.php?f=14&t=807
The basic SR style clutch is a high quality standard-style clutch with approximately 8 shoes and one large spring holding the shoes in place.
These standard-style clutches will work on a slider but are not ideal. The rear side of the clutch has a plate with metal stoppers which can snap off under the extremely severe operation of the clutch at the slide onset point. SR clutches are not user-servicable so if something goes wrong you will need to purchase a brand new unit. These clutches do not endure use under 2000rpm either so they are not the best choice, but can be used if budget is critical.

The GT range of clutches is the perfect solution as they offer much more robust spring systems and a fully user serviceable. All components for the GT clutch are available separately and a rebuild guide is available in the forum here: http://www.cutpriceracing.com.au/phpbb3/viewtopic.php?f=14&t=850
The GT clutch can endure plenty of operation where engine RPM is below 2000rpm, and it can be set up for different engagement speeds (aggressive or smooth) which can help with drifting driving styles. The results speak for themselves, we have had several customers report back to us regarding how well the GT clutches work with drift trikes.
We recommend the 12T model and approximately 70T rear sprocket when using standard rear go kart rims and rear slicks.
You can find our range here: http://www.cutpriceracing.com.au/store/Clutch-RACE-CPR-GT-35-Pitch-12-Tooth-19mm-3-4-bore-Chain-Sprocket/
Guide – Building a powered Slider Drift Trike PART 5 – Is there an easier way?
Yes, at Cut Price Racing we offer a complete kit so that you don’t need to do any of the research, we have bundled a kit which includes all the correct components to get your drift trike up and running at the best price.
You can find the complete kit here: http://www.cutpriceracing.com.au/store/Powered-Slider-Trike-Complete-Rear-End-Kit/